How to Repair Timber Beams

Beam Repair - permanent, non shrink epoxy resins

Property Repair Systems - talk to real people about timber beam repair - 01626 872886

Click for Home Page


Repair wood beams using our Epoxy Resins and connection bars - full structural strength restored, Engineering Calculation Service available.

Rotted beams can have new ends or mid sections made by us as Timber-Resin Splice Kits, or you can buy the resins and bars separately to make your own repairs. No need to scrap good beams, no need for extensive buildings works or opening up.

Click here to see Epoxy Resins, check prices or to Order


Repairing Holes in Structural Timber Beams

To Fill a Hole or Crack by pouring Epoxy Resin

1. Grind or chisel out all loose wood, vacuum out the dust.

2. Using a Mixing Paddle in an Electric Drilling Machine mix the 3 resin parts thoroughly in the bucket provided.

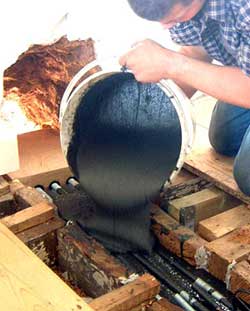
3. Pour the Structural Epoxy Pouring Resin into the hole. It will gradually self-level.

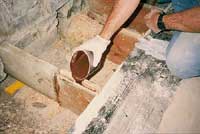
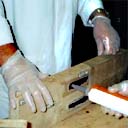
Pouring Structural Epoxy Resin into a hole in a timber beamPouring a top slot in a small Joist - Structural Epoxy Pouring Resin

Pouring Structural Epoxy Resin and Grout - 7.5 litres and 1 litre.

Clicking on a blue Product Name takes you directly to the Shopping Page,

or Click here to go to our Shopping Pages

Click for Home Page


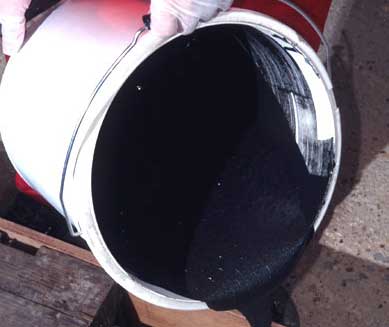
Structural Epoxy Pouring Resin or Grout - 1.0, 2.5 and 7.5 litre - the Resin version is thinner than the Grout version

A three part epoxy structural repair material, supplied as two liquids and separate aggregate, in a large plastic mixing tub.

Designed for pouring into holes and voids in timber and concrete.

Ideal for pouring over Epoxy/Glass, Carbon Fibre and Steel Bars and plates, as part of a repair to reinforce a damaged wooden beam.

Also used for Bearing Pads and Mountings, to repair or renew wooden bases or supports.

Structural Epoxy Pouring Resin - easy to pour - self levels.

Structural Epoxy Pouring Grout in 7.5 litre pack size.

Click here to go to our Shopping Pages

Click for Home Page


To Fill a Hole or Crack by hand placing Epoxy Putty

1. Grind or cut out the crack to make a clean slot at least 15mm wide and 15mm deep.

2. Remove all dust by brush or vacuum.

3. Prime with Epoxy Primer and place Mouldable Epoxy Putty

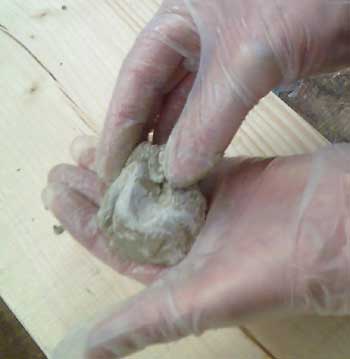
Priming wood ready for repair using Epoxy Mouldable PuttyHand mixing Mouldable Epoxy Putty

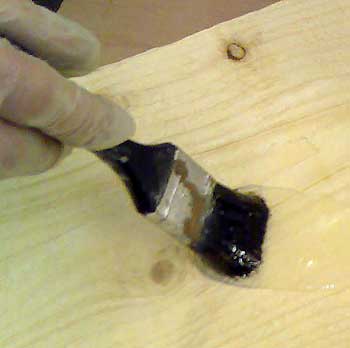
Priming wood with Epoxy Primer. Mixing Mouldable Epoxy

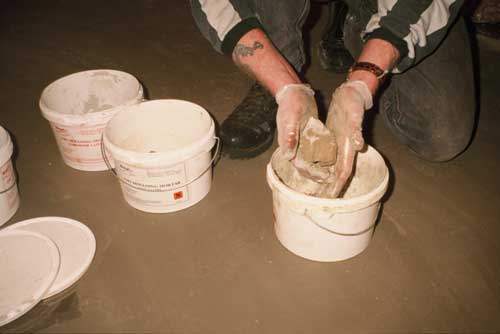
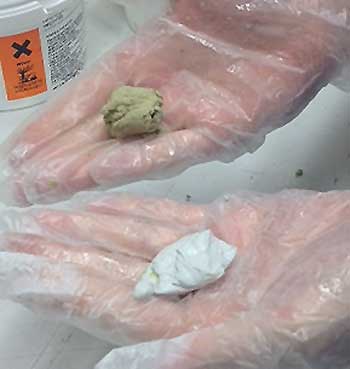
Two parts of mouldable epoxy puttyMixing the epoxy putty

Two part Mouldable Epoxy Putty. Mixing in the gloved hand - wetting hands helps.

Clicking on a blue Product Name takes you directly to the Shopping Page,

or Click here to visit our Shopping Pages

Click for Home Page


How to choose a crack repair method and material

General principle - cut out the cracks with a saw, router, masonry grinder, or Allsaw (a superb slot cutting machine, available from Hire Shops), to form square edged slots, and remove all dust and debris. Avoid 'V' shaped slots - the repair will be much weaker.

Repair Thickness - the more material that we can put into the repair, in terms of width and depth, the better it will be able to accommodate natural movements caused by changing temperatures and therefore the better it will last.

Caution - Always consult a Structural Engineer and the building's Insurers before proceeding.

Click to visit our Shopping Pages

Click for Home Page


Fine to medium cracks - hairline to 15mm wide.

Cut out to - 15mm to 25mm in width

Apply Epoxy Primer liquid by brush and whilst tacky lay in the putty-like repair mortar, Mouldable Epoxy Putty.

Epoxy Primer - available in 500cc, 1 litre and 5 litre, two pot, liquids.

Mouldable Epoxy Putty - available in 500cc and 1 litre, two pot, putties.

Cut out cracks to a clean slotCut out the rot ready to Prime for filling with Mouldable Epoxy PuttyLintol with rot removed ready for priming before repair with Mouldable Epoxy Putty

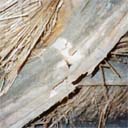
Split in a principal roof rafter timber. Rot in a multi part timber roof frame. Rot in a timber fireplace Lintol.


Click to visit our Shopping Pages

Click for Home Page


Repairing Splits along the grain in Structural Timber Beams

To Fill a Split or Shake using filler putty

1. Grind or cut out the split to make a clean slot

2. Remove all dust by brush or vacuum.

3. Prime with Epoxy Primer by brush and fill the crack with Mouldable Epoxy Putty

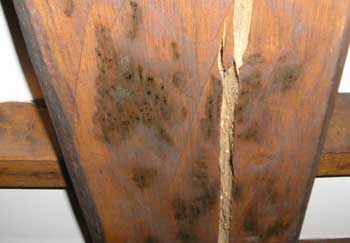
Centre 'shake' in a structural timber - natural drying out splitCentral split (shake) filled with Mouldable Epoxy Putty in Epoxy Primer, ready for sanding and colouring.

Centre split, called a 'shake', caused by drying out. Centre crack filled with Mouldable Epoxy Putty.

(Note - Mouldable Epoxy Putty can be tinted with our Colouring Powder or painted after drying)

Clicking on a blue Product Name takes you directly to the Shopping Page,

or Click here to visit our Shopping Pages

Click for Home Page


How to choose a crack repair method and material

General principle - cut out the cracks with a saw, Router, masonry grinder, or Allsaw, to form square edged slots, and remove all dust and debris. Avoid V shaped slots - the repair will be much weaker.

Repair Thickness - the more material that we can put in to the repair, in terms of width and depth, the better it will be able to accommodate natural movements caused by changing temperatures and therefore the better it will last.

Caution - Always consult a Structural Engineer and the building's Insurers before proceeding.

Click to visit our Shopping Pages

Click for Home Page


Fine to medium cracks - hairline to 15mm wide.

Cut out to - 15mm to 25mm in width

Apply Epoxy Primer liquid by brush and whilst tacky lay in the putty-like repair mortar, Mouldable Epoxy Putty.

Epoxy Primer - available in 500cc and 1 litre, two pot, liquids.

Mouldable Epoxy Putty - available in 500cc and 1 litre, two pot, putties.

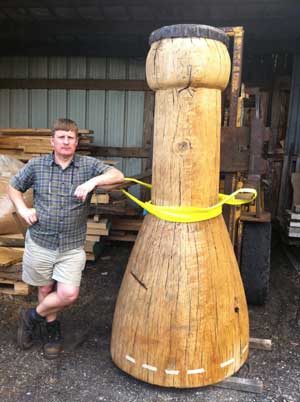
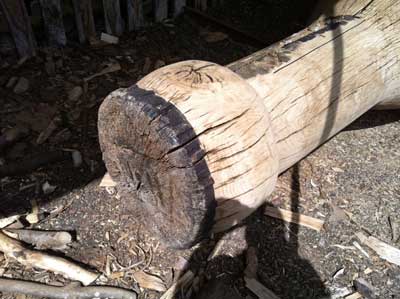
Vimto bottle neck awaiting fillingClose up of Vimto bottle top showing large splits and cracks

Vimto Bottle neck awaiting filling. Close up photo of the Vimto Bottle top showing splits and cracks.

Vimto Bottle fully restored and back on display

Vimto Bottle fully restored and back on display.

Click to visit our Shopping Pages

Click for Home Page


To Fill a Split or Shake by Injection

How to inject Cracks - summary for a range of crack widths

1. Clean the crack using either a sharp, pointed tool, grinding wheel, cutting disc, Allsaw or rotary saw.

2. Remove all dust by brush or vacuum.

3. Push the injection needle or nozzle (diameter chosen according to crack width) to the base of the crack and slowly inject resin

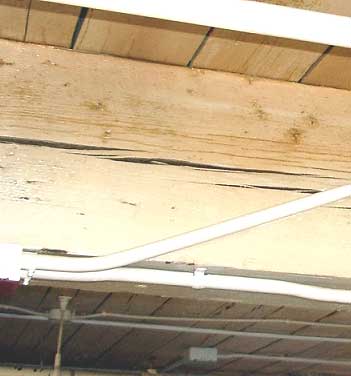
Cracks along the grain - shakes - in timber beam

Crack in a rendered wall before cleaning. Splits or 'shakes' in a timber beam. Slot cut out wide, ready for filling.

Click here to visit our Shopping Pages

Click for Home Page


How to choose a crack repair method and material by Crack Width

1. Using Thixotropic Injection Resin - slow set version - sets after 2.5 hours

Hairline Cracks - less than 2mm wide - indirect, fill Syringe Method, with fine needles, or cut out to 5mm +

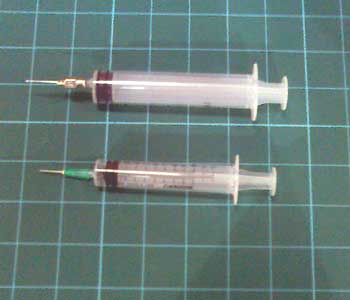
Syringes with needles - for Thixotropic Epoxy InjectionInjecting hollow render using Syringes without needles

Syringes with needles - use Thixotropic Epoxy Slow Set (non slump),

or Epoxy Primer (runny) without needles, pushed into 4mm holes at 50mm centres.

For Voids you can Inject Polyurethane Liquid - using Syringes, no needles. The Polyurethane reacts with moisture in the timber, expands rapidly and sets within 5 to 15 minutes.

Click for Home Page


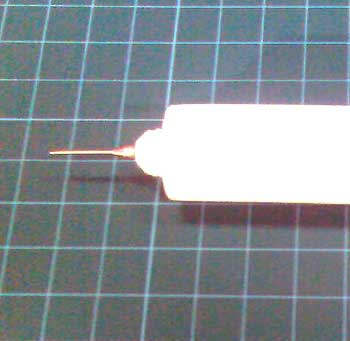
2mm to 4mm - direct Cartridge Injection Method, with 2mm needle, or cut out to 5mm +

Cartridge 400cc with 2mm needle - for Thixotropic Injection

Needle fitted to 400cc Cartridge - use Thixotropic Epoxy Slow Set (non slump).

Click for Home Page


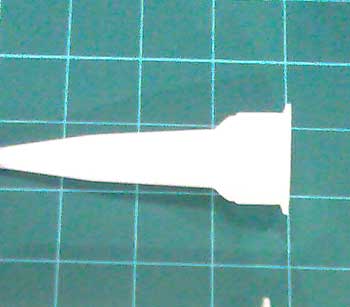
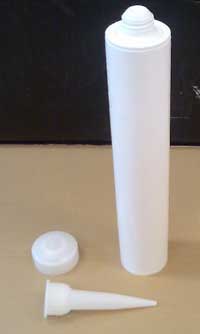
5mm + - direct Cartridge Injection Method, with plastic pointed nozzle, or cut out to 10mm +

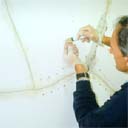
Cartridge Kit for 400cc Skeleton GunsInjection demostration - injecting resin into a slot through a plastic cover

Standard pointed nozzle - tapers, cut to suit hole. Standard 400cc tube. Injecting a slot behind a plastic cover.

Cone pointed plastic nozzle for 400cc or 1000cc - cut to 5mm hole diameter

Cartridge - use Thixotropic Injection Resin or Slow Set version

Click for Home Page


General principle - where possible, for the strongest repair, cut out the cracks with a saw, Router, masonry grinder, or Allsaw, to form square edged slots, and remove all dust and debris. Avoid V shaped slots - the repair will be much weaker.

Repair Thickness - the more material that we can put in to the repair, in terms of width and depth, the better it will be able to accommodate natural movements caused by changing temperatures and therefore the better it will last.

Caution - Always consult a Structural Engineer and the building's Insurers before proceeding. It is important to establish and eliminate the underlying cause of the cracking before Injection, otherwise further cracks are sure to appear.

Tell Tales - install our Tell Tail plastic crack movement measuring units and monitor for 3 months, if you are not sure that movement has ceased.

Click to visit our Shopping Pages

Click for Home Page


How to make cosmetic Injection Repairs - matching colour or texture

1. Using Thixotropic Injection Resins - standard or slow set - colour options:

- basic resin colour - sand/buff - matches yellow/light brown

- grey - Additive - pour in pigment into the resin Base (Part B) of the product

- red - Additive - pour in pigment into the resin Base (Part B) of the product


2. Using Mouldable Epoxy Putty - colour options:

- basic resin colour - sand/buff - matches yellow/light brown

- grey - add black Mortar Powder - mix powder into the mixed product

- red - add Red Mortar Powder - mix powder into the mixed product

- white - add White Mortar Powder - mix powder into the mixed product

Click for Home Page


3. All Products - obtaining colour and texture over a repair using original Site materials:

- grind up wood, stone, brick or mortar to a dust - apply to the wet product surfaces

- or apply dust to an additional wet coat of Epoxy Primer after the injected product has set

Click to visit our Shopping Pages

Click for Home Page


Repairing Cracks across the grain in Structural Timber Beams

To Fill a Crack across the grain by Pouring Epoxy Resin

1. Grind or chisel out all loose wood, vacuum out the dust.

2. Cut slots into the top of the timber to hold the reinforcing bars.

2. Using a Mixing Paddle in an Electric Drilling Machine mix the 3 resin parts thoroughly in the bucket provided.

3. Pour the Structural Epoxy Pouring Resin into the hole. It will gradually self-level.

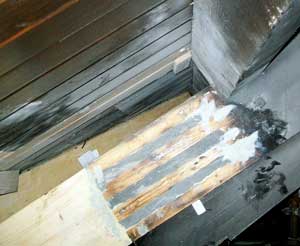
Pouring Structural Epoxy Resin into a hole in a timber beamCracked roof rafter - broken through - needs bars for reinforcement.

Pouring Structural Epoxy Resin and Grout - a finished job, showing filled slots. Cracked roof rafter - broken.

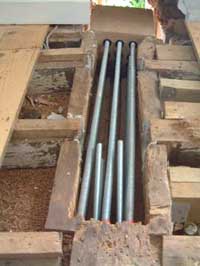
(Note - zinc plated high tensile allthreaded bar being used as reinforcement along the grain direction)

Clicking on a blue Product Name takes you directly to the Shopping Page,

or Click here to go to our Shopping Pages

Click for Home Page


Structural Epoxy Pouring Resin or Grout - 1.0, 2.5 and 7.5 litre - the Resin version is thinner than the Grout version

A three part epoxy structural repair material, supplied as two liquids and separate aggregate, in a large plastic mixing tub.

Designed for pouring into holes and voids in timber and concrete. Ideal for use with Epoxy/Glass, Carbon and Steel bars and plates, as part of a composite, reinforced repair structure.

Also used for Bearing Pads and Mountings, to repair or renew wooden bases or supports.

Structural Epoxy Pouring Resin - easy to pour - self levels.

Structural Epoxy Pouring Grout in 7.5 litre pack size.

Click here to go to our Shopping Pages

Click for Home Page


Summary - bars and rods

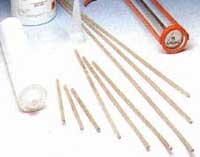
1. Epoxy/glassfibre rods - easy to cut with a hacksaw - buy by the 1 metre length, or we cut to length.

2. Allthreaded Zinc Plated High Tensile Steel Bars - buy by the 3 metre length, or we cut to length - can be coupled

3. Stainless Steel Allthreaded High Tensile Steel Bars - buy by the 1 metre length, or we cut to length - can be coupled.

4. Helical Stainless Steel Bars - buy by the 1 metre or 7 metre length, or we cut to length.

Clicking on a blue Product Name takes you directly to the Shopping Page,

or Click here to visit our Shopping Pages

Click for Home Page


How to choose a rod or bar

THREADED STEEL BARS - Zinc Plated - high tensile bars, available in the following diameters;

  1. 12 mm - 3m max, zinc plated, threaded
  2. 16mm - 3m max, zinc plated, threaded
  3. 20mm - 3m max, zinc plated, threaded
  4. 25mm - 3m max, zinc plated, threaded

Specials - cut to your requirements, length to suit, in Stainless Steel or Zinc Plated, with or without threads to M8, M10, M12, M16, M20 and M25

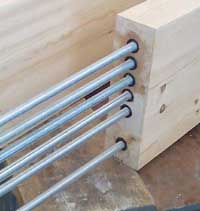
Dug out timber carrier beam awaiting resin.Timber-Resin Splice Beam showing connection bars.

Examples of Zinc Plated High Tensile Allthread Bar in use.

Click to visit our Shopping Pages

Click for Home Page


EPOXY-GLASSFIBRE BARS - Smooth Finish - as extensively tested and proven over the last 20 years, these bars feature in the long term evaluation carried out in the UK and Europe, which has resulted in the development of EUROCODE 5, a design and specification handbook for the use of resins in composite repairs in buildings (price, £15).

The Epoxy-Glass bars are available in the following diameters;

  1. 6mm - in 1 metre lengths
  2. 8mm - in 1 metre lengths
  3. 10mm - in 1 metre lengths
  4. 12mm - in 1 metre lengths
  5. 16mm - in 1 metre lengths

They can be ordered cut to length. They can be use to tie and link timbers and masonry.


Click to visit our Shopping Pages

Click for Home Page


Repair Insect Damage in Structural Timber Beams

To consolidate insect holes using Epoxy Primer/Consolidator liquid

1. Vacuum out the dust.

2. Using a Mixing Paddle in an Electric Drilling Machine mix the 2 resin parts thoroughly in the tub provided.

3. Transfer the mixture to another tub and re-mix, taking particular care to remove all the resin from the walls and base of the first tub.

3. Pour the Epoxy Primer/Consolidator onto the wood. It will gradually self-level and soak in, hardening the timber and filling the holes.

4. Additional methods - by Injection using a Syringe.


SHOPS


Repairs | Beams | Privacy Policy | Returns Policy

Contact | About Us | About the Author


Property Repair Systems

T: 01626 872886

E: Mail us help@propertyrepairsystems.co.uk


Other Property Repair Systems Sites:

www.drywallandfloor.co.uk - membranes for lining damp walls, floors, basements and cellars

www.epoxy-info.co.uk - epoxy resins for repairing wood, concrete, brick and stone

www.fire-door-paint.co.uk - upgrade doors to 30 minutes fire resistance

www.joist-repair.co.uk - how to quickly repair joists and beams of any size

www.propertyrepairsystems.co.uk - our Home Site

www.steel-fire-paint.co.uk - treat steel with Intumescent Paint to provide fire protection

www.timber.org.uk - systems of repair, with step by step methods


Site written by: David Moore

David Moore, B.A. (Hons.), C.T.I.S., C.R.D.S. Technical Author

Google+